

When a requested update or bugfix comes across my desk, there is nothing more daunting when a fresh clone/fork of repository completes and then the installation process ensues. If you are like me, you almost don't even want to look at your screen in fear of that system alert or red text to appear within your console, meaning only one thing: there are installation errors.
But let's assume for a second that your installation goes without a hitch. NPM gives you a grand success message and everything was installed without a hiccup. You then proceed to type gulp watch or whatever your task manager of choice and then the whole process crashes followed by you slamming your fist on your desk in frustration.
The two examples that were listed above are more common than we would like to admit. It can be just as simple as a syntax error or as bad as a deprecated package that simply doesn't exist anymore. As I'm sure that most developers are aware of, one of the largest and problematic issues of working with legacy projects is how to manage project dependencies.
While this fiasco persists within all facets of development, for the sake of this post, we will focus on the front-end side (whew).
Diagnosing the problem
While I don't consider myself a genius when it comes sifting threw the needle in a haystack that is an error log, for most developers a npm install error log can deciphered with ease. I can say that most NodeJS packages now-a-days do a pretty good job of explaining what the problem is in layman terms. It could be just as simple as saying that a package doesn't exist or something is undefined, and this can remedied by performing an additional installation command.
Where diagnosing becomes difficult is when multiple dependencies of a NodeJS module and in turn their dependencies start throwing errors. As I'm sure most of us can agree, this is what we as developers begin to lose sleep over.
A couple different solutions
In my experience, the two scenarios that I briefly outlined above can be solved about 80-90% of the time with a couple different or a combination of tactics.
NodeJS version
If the project that you are trying to work on is more than 2-3 years old, it is very possible the version of NodeJS that is installed on your machine is too recent for the dependencies that are listed within the package.json that accompanies your project.
NodeJS modules
A common mistake that we all make when we are building our package.json file and utilizing the npm install command is that we just tell NPM to retrieve the most stable and recent version of a package and added as a dependency. In doing so, our dependency list could look like this:
"dependencies": {
    "bower": "^1.7.2",
    "connect-redis": "1.4.5",
    "ejs": "~0.8.4",
    "grunt": "0.4.2"
}
The issue with this JSON object is the ~ and ^ punctuation (source) before the version numbers. What these mean, respectively, is the version is approximately this number or it needs to be compatible with the listed version. While for one package it is not detrimental, spreading this level of variability throughout the entire project can be disastrous.
So what's next?
Yeah so what's next? Well here are a couple routes you can take to trouble shoot these issues that can creep up during an installation/run.
Using n to change your version of NodeJS
NodeJS gives a tool called NVM (Node Version Manager) to control our versions of NodeJS that are active on our machines. I have found that this module can be clunky at best and the command line syntax is just weird.
I recommend using n. n is a simpler version of NVM and allows you to easily transition between versions of NodeJS on your machine.
How to install/use n
1. Before we install anything, we need to make sure that your user has read/write access to the /usr/local/bin/ directory on your machine so we can modify the "node" directory that will live there. To do this, enter the following command followed by your user password:
$ sudo chown -R $(whoami) /usr/local
2. After that is complete, now we need to install n globally on your machine like so:
$ npm install -g n
Note: If you computer asks you to perform this action as an Administrator, simply prefix this command with sudo.
3. Now that n is installed, we can see all of the actions that are available to us by simply entering the following command:
$ n
which should look like this:
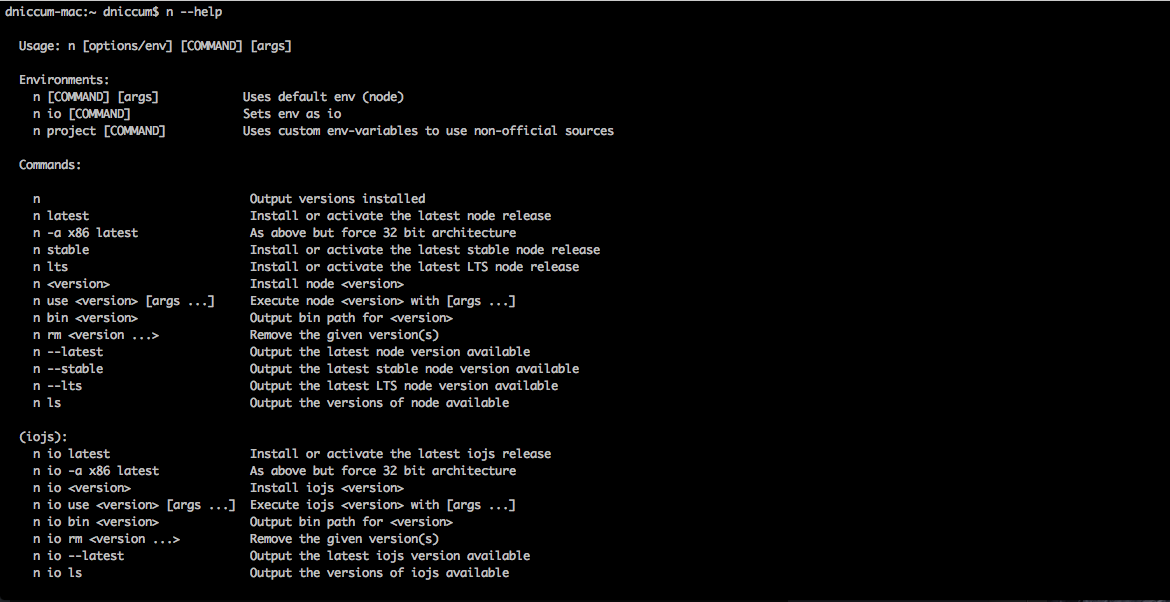
Note: Once versions of NodeJS are installed, to be able to return to this screen use the n --help command.
4. Before we start getting crazy with installing all sorts of NodeJS on your machine, lets give ourselves a good baseline to work from by install the current version of NodeJS on our machine. First enter:
$ node -v
The result that is outputted should look like this: v5.3.0. Note the version number (not including the v) and then enter this command:
$ n [your current version]
This will install your current version of NodeJS within n. Next enter this command to install the most recent stable version of NodeJS:
$ n latest
Once finished, enter the n command again and you should see something like this (note your version numbers could be different):
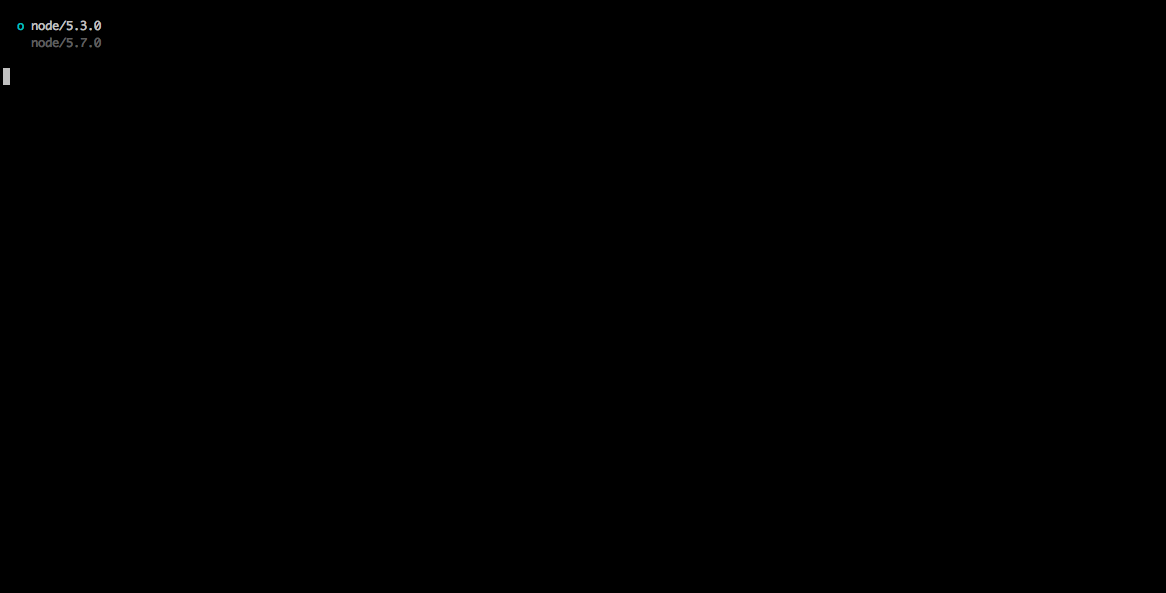
Now you can use your arrow keys to navigate the versions installed and then hit Enter to select your version, or just use Ctrl + C to exit. Go ahead and select the newest version that you have, and then hit Enter. Give your machine a second to process the change and then it will exit the screen. Afterwards test your version with:
$ node -v
Note: Make sure you have killed all of your NodeJS servers/process!
Assuming you did everything correctly you should see your version change. But that's not all! You can go back as easily as you can go forward. If you enter:
$ node ls
This will output all of the versions of NodeJS that are available to install. You can simply copy the version number that you want and then repeat the process to be able to install legacy versions of NodeJS. It's that easy! Once you have found a version that you think will work (it may take some trial and error), purge the node_modules directory and the retrying the install and run commands.
Fix your module versions
As I touched on earlier, another way we can troubleshoot these errors is not allow NPM to install versions of our dependencies that are not explicitly what we ask for. The punctuation marks (^, ~) that are prepended to our version numbers can cause modules to be full feature versions ahead of what we want; causing major compatibility issues.
To fix this, simply remove any prepended ^ or ~ marks within your package.json file, purge the node_modules directory and the retrying the install and run commands.
Disclaimer
Again, restating what I said earlier, I have found these two methods of debugging to solve about 80-90% of my compatibility issues. However keep in mind that other things can go wrong, things that are not covered here. But hopefully this will get you pointed in the right direction.